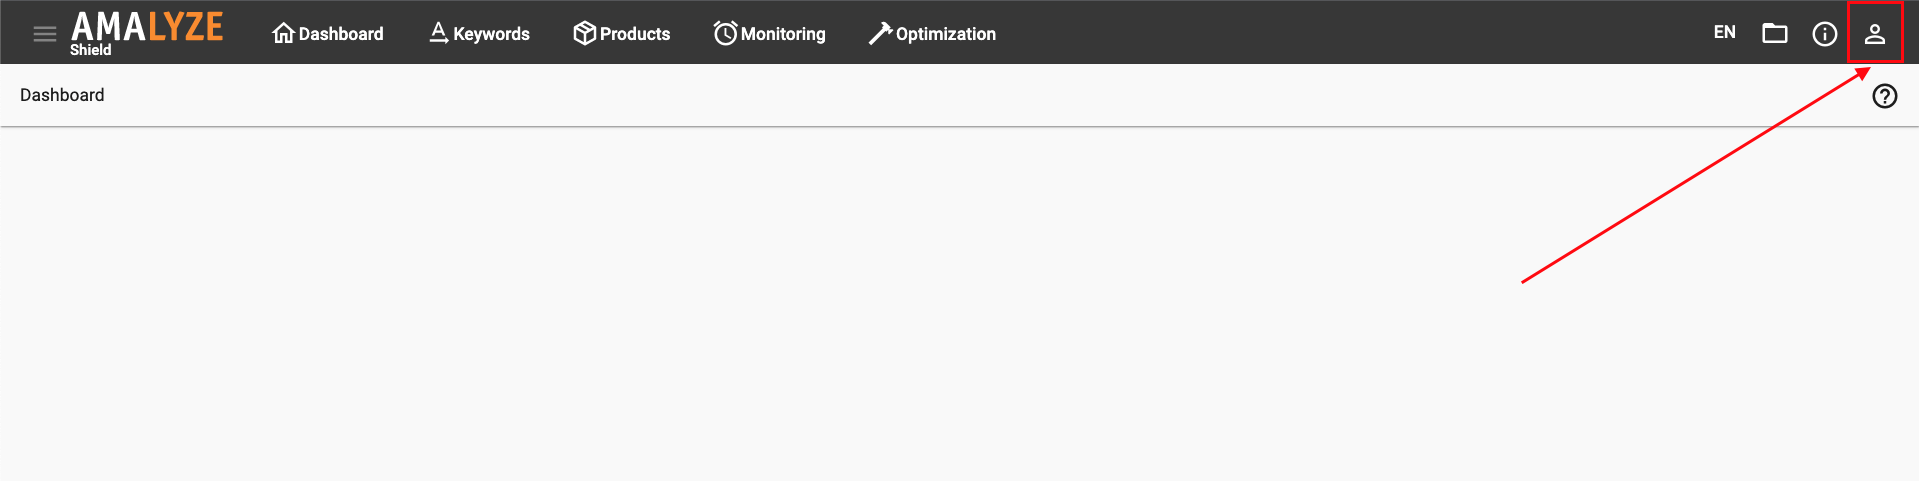
Account avatar icon
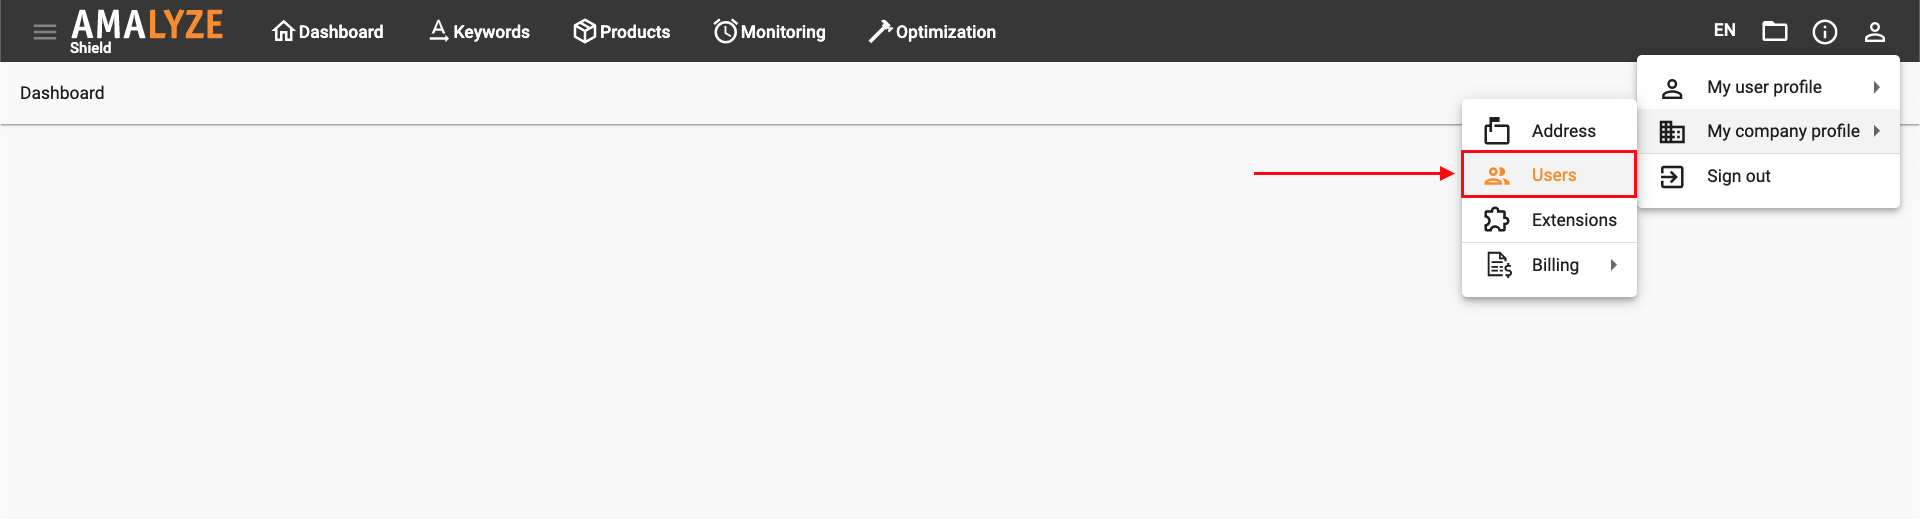
My company profile

Users
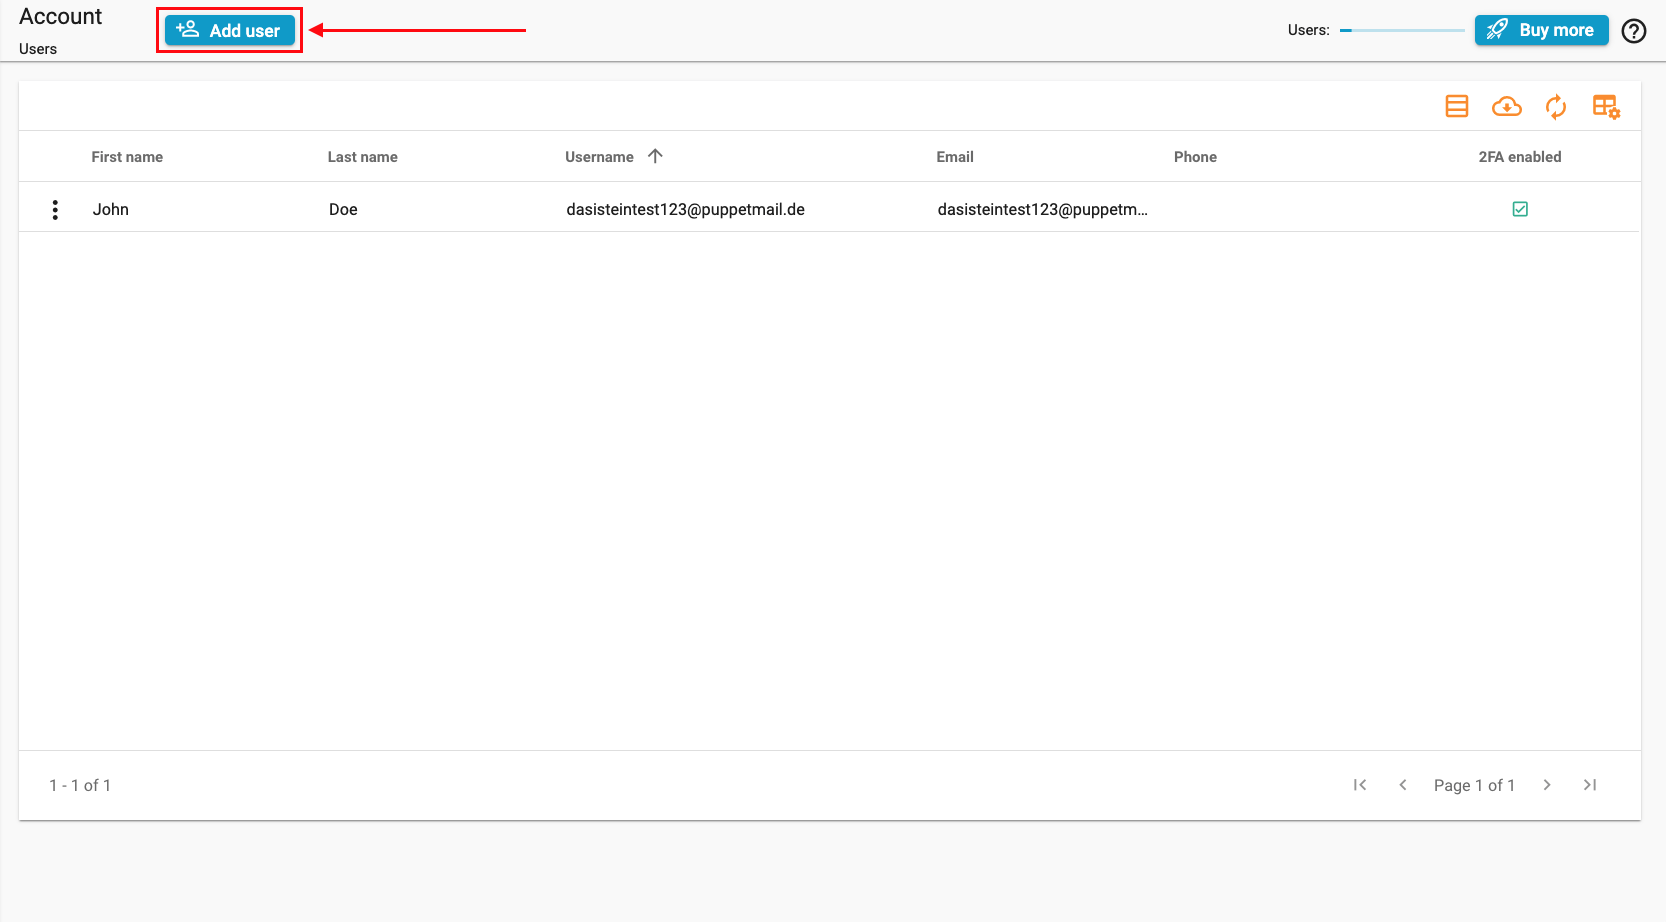
Add user
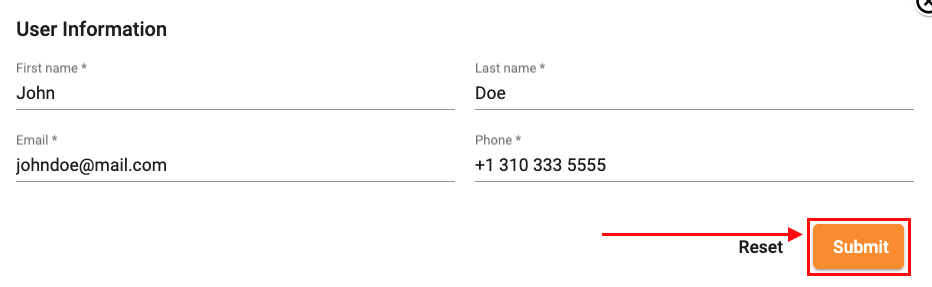
User Information & Save
Additional keywords: create new user, how to create a new user, how to create a user, new user, settings account users, shield

Additional keywords: create new user, how to create a new user, how to create a user, new user, settings account users, shield